Marc Vandiepenbeeck (climatologist R.M.I.)
Introduction
Collecting rainwater in a container may seem an elementary operation, but measuring the amount of rain is far less straightforward. And if you think about snow, it's even harder to measure.
About thirty years ago, I took part in a symposium on rain gauges and measurement problems. It was held at the ETH (Eidgenössische Technische Hochschule - Swiss Federal Institute of Technology) in Zurich: International workshop on precipitation measurement). The outcome was that measuring rainfall is very complicated. The organiser studied most of the rain gauges and pluviographs used in WMO member countries.
The position
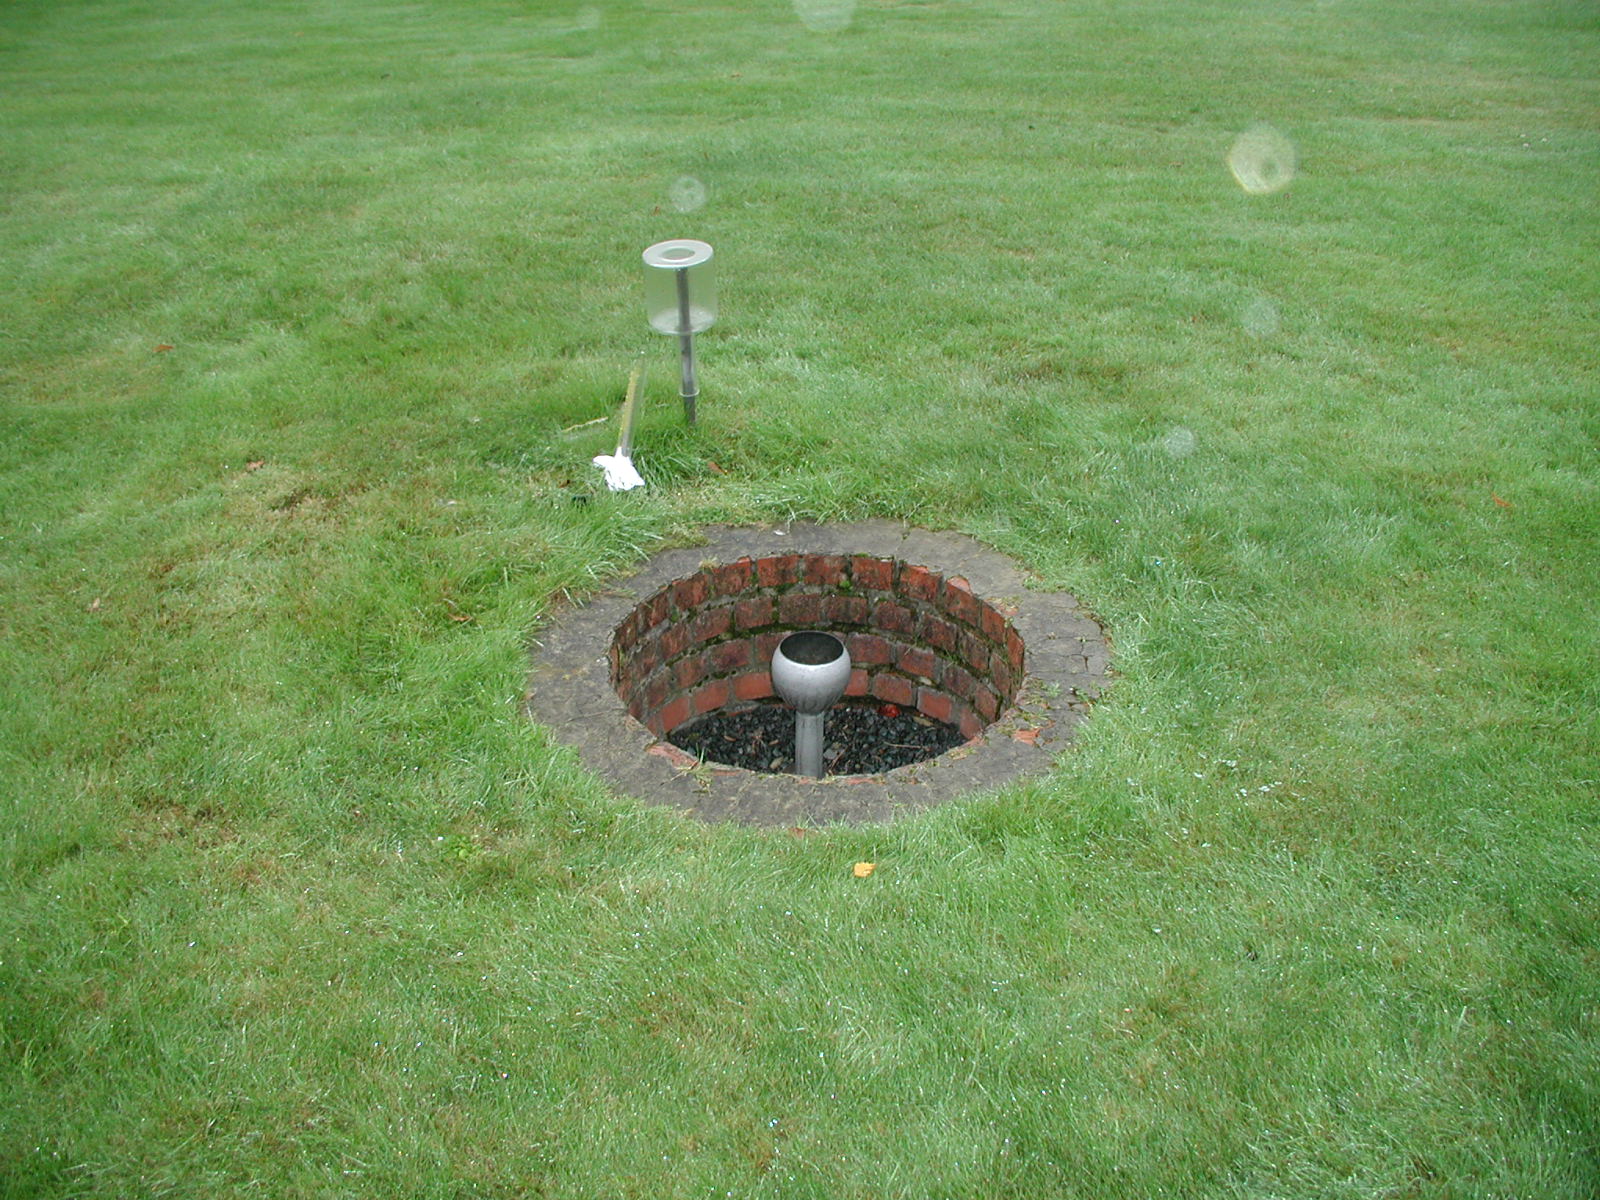
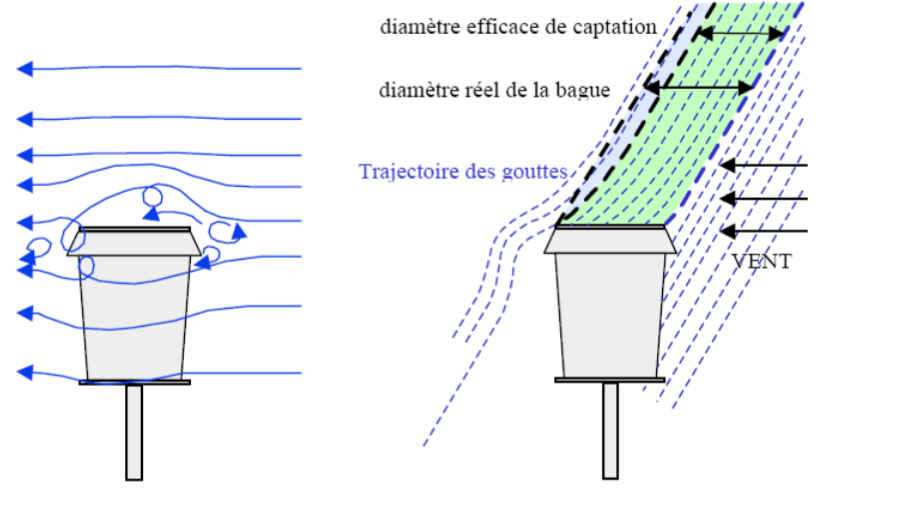
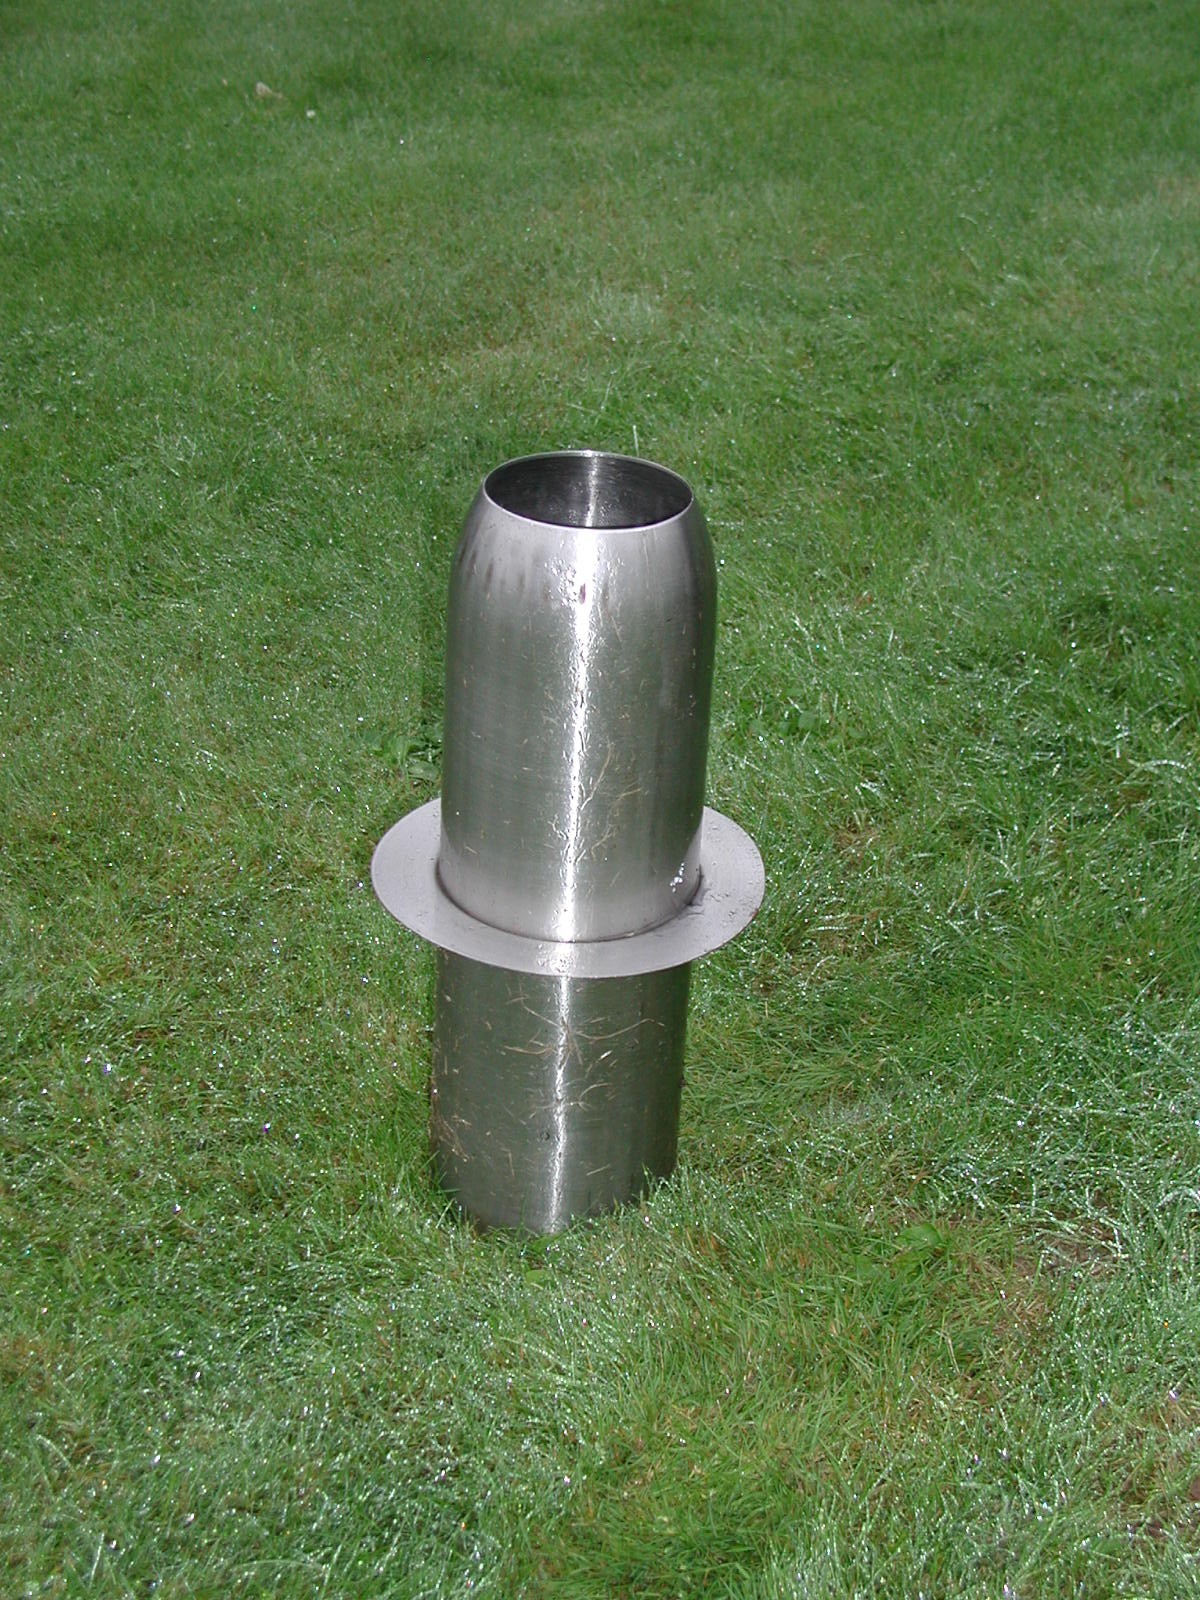
Ideally, the rain gauge should be placed flush with the ground in a hole about one metre in diameter (see image 1). At ground level, the wind speed is zero. As a result, all the water drops will fall into the rain gauge because there is no deviation due to turbulence at the opening of the rain gauge (see image 2). As wind speed increases with height above ground level, the higher the rain gauge, the more water is lost from the gauge.
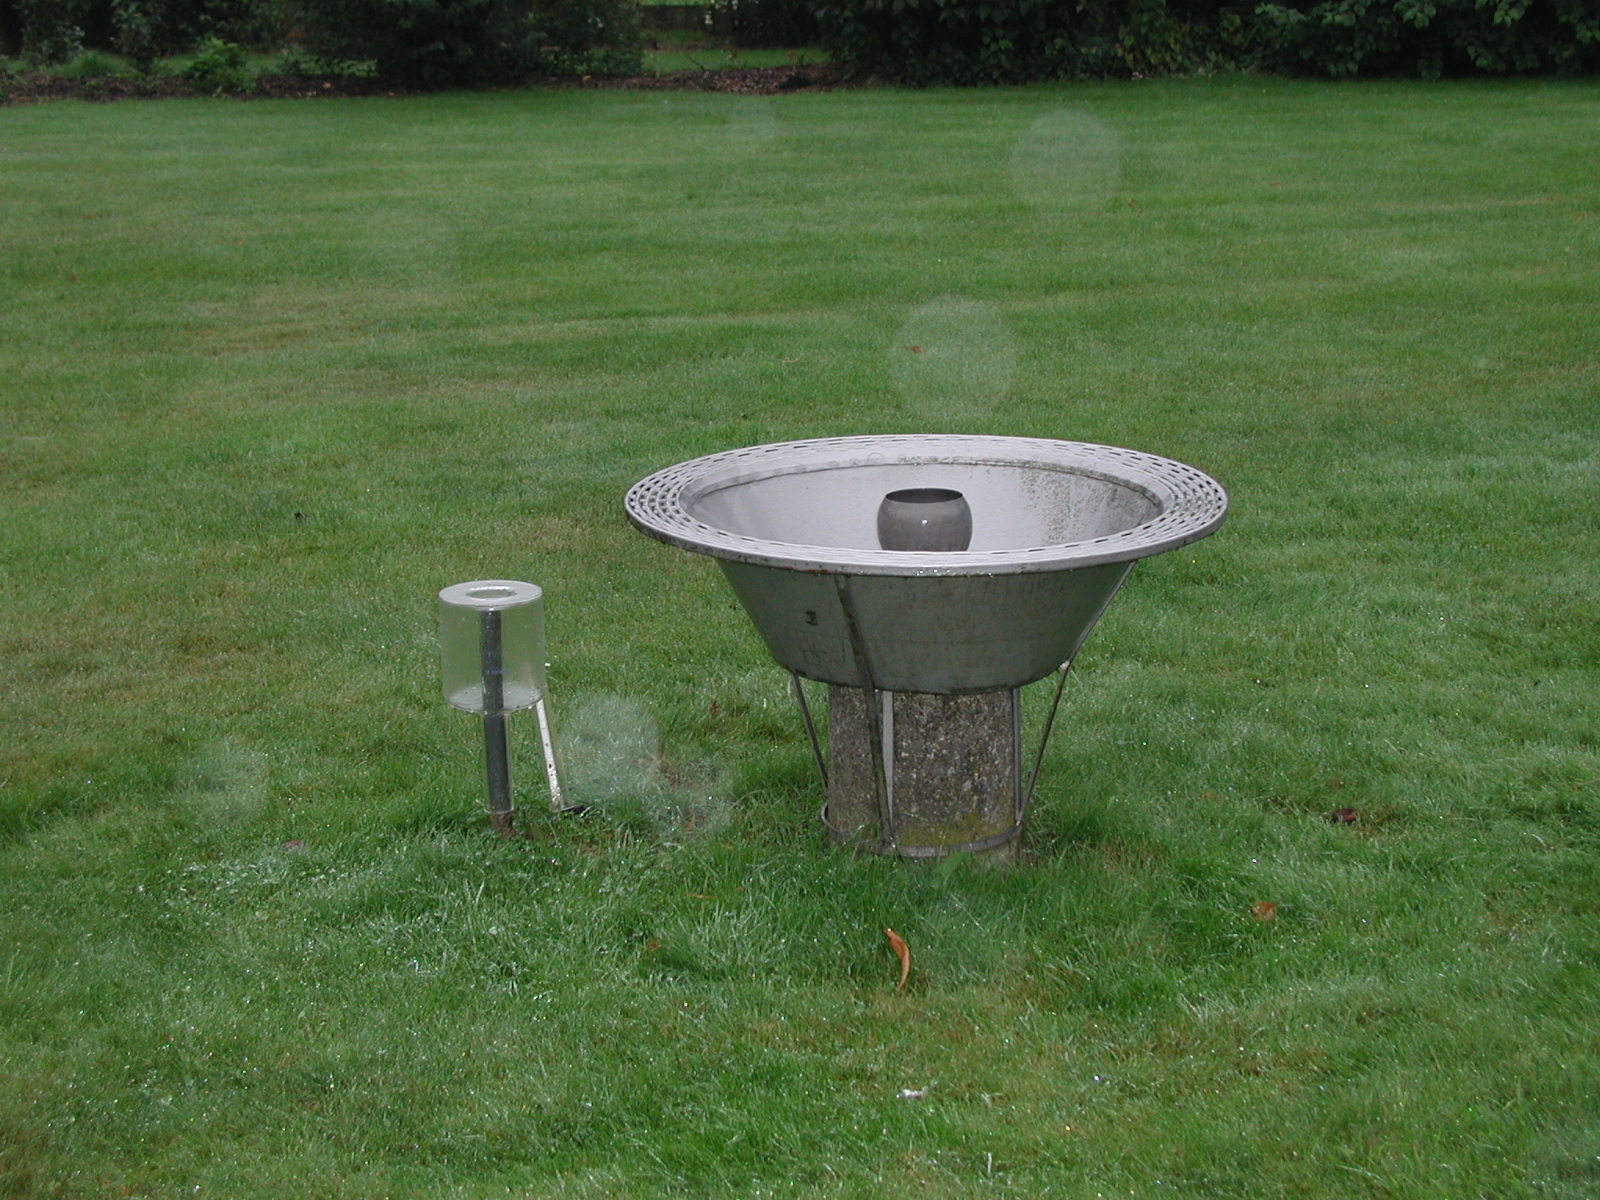
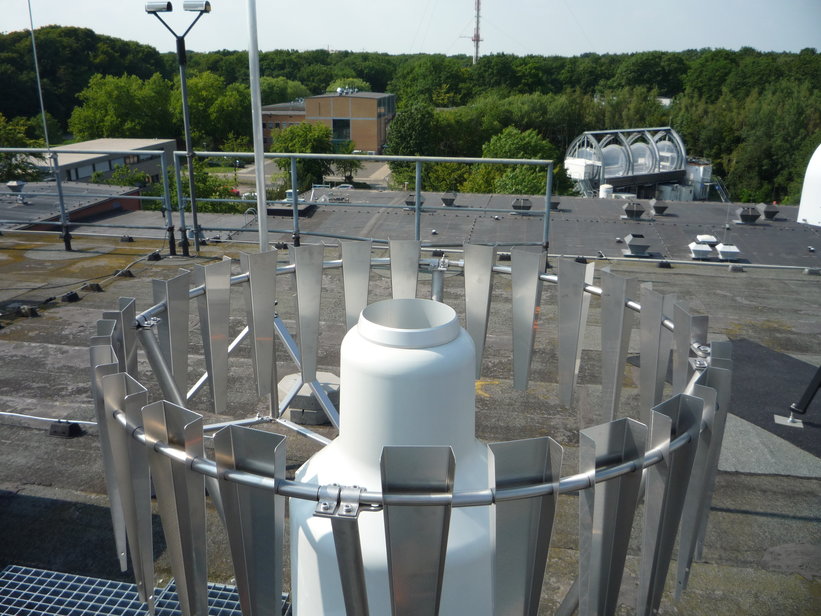
The Swiss study showed that Belgian and Swedish rain gauges performed the best. The reason: the presence of a Nipher cone. The purpose of the Nipher cone (see images 3 and 4) is to reduce wind turbulence as much as possible in rain gauges located a little higher up: observers cannot be forced to get down on their knees to measure rain every day in any kind of weather. A study by R Sneyers showed that a rain gauge with a Nipher cone collected 3% less rain than one at ground level.
The symposium showed that the environment is also important. A completely open site is not ideal. Measurements taken in a completely open area showed significant deficits compared with a reference rain gauge considered to be ideally placed. Two particular situations: one rain gauge was surrounded by palisades 1 m high and 5 m away from the rain gauge, the other the palisade was 2 m high and 10 m away. This situation was the best.
The rule generally used at the RMI is that obstacles must be at least 1.5 times their height from the rain gauge. So a wall 1 m high must be 1.5 m from the rain gauge. We are well aware that these conditions are not always easy to meet.
 |  |
 |  |
The device
1. The rain gauge
Rain gauges are generally made from an alloy or plastic. The metallic nature of the alloy means that the rain gauge has a high thermal capacity. In very warm weather, and especially in very sunny weather, it can become hot. If this is the case when it starts to rain, there may be a significant evaporation, resulting in a substantial loss of water to be measured.
The shape of the rain gauge is also important. If the rain gauge has a large surface area, there will be more loss through evaporation and wetting before the first measurement can be taken.
The problem of wetting and evaporation also applies to tipping bucket rain gauges and weighing rain gauges.
2. The pluviograph
There are several types of rain gauge. The first is shown in image 5.
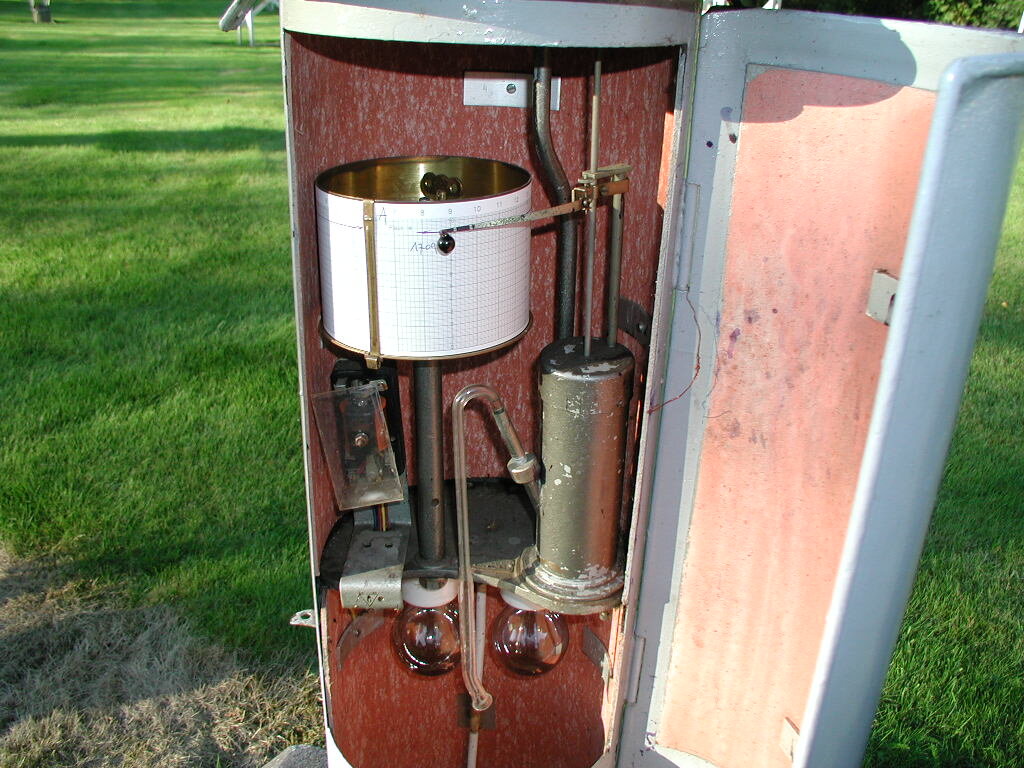
In this device, the water entering the instrument opening is fed into a small reservoir shown on the right of the image 5. This tank contains a float. On the stem of the float, there is an arm at the end of which you can see a pen and an ink reservoir. When water fills the reservoir, the water causes the float to rise and the pen leaves a trace on the paper placed on a drum that makes one revolution in 24 hours. On the side of the reservoir there is a siphon that engages when the reservoir is full. This drains the tank and the measuring process continues. This is clearly visible on the rainfall graph shown in image 6. The vertical line represents the draining of the reservoir.

Image 5 shows two lamps underneath the recording system. When there is a risk of freezing, they are switched on so that the heat given off by these lamps prevents the blocking of the system when temperatures are below freezing point.
3. The OTT weighing rain gauge
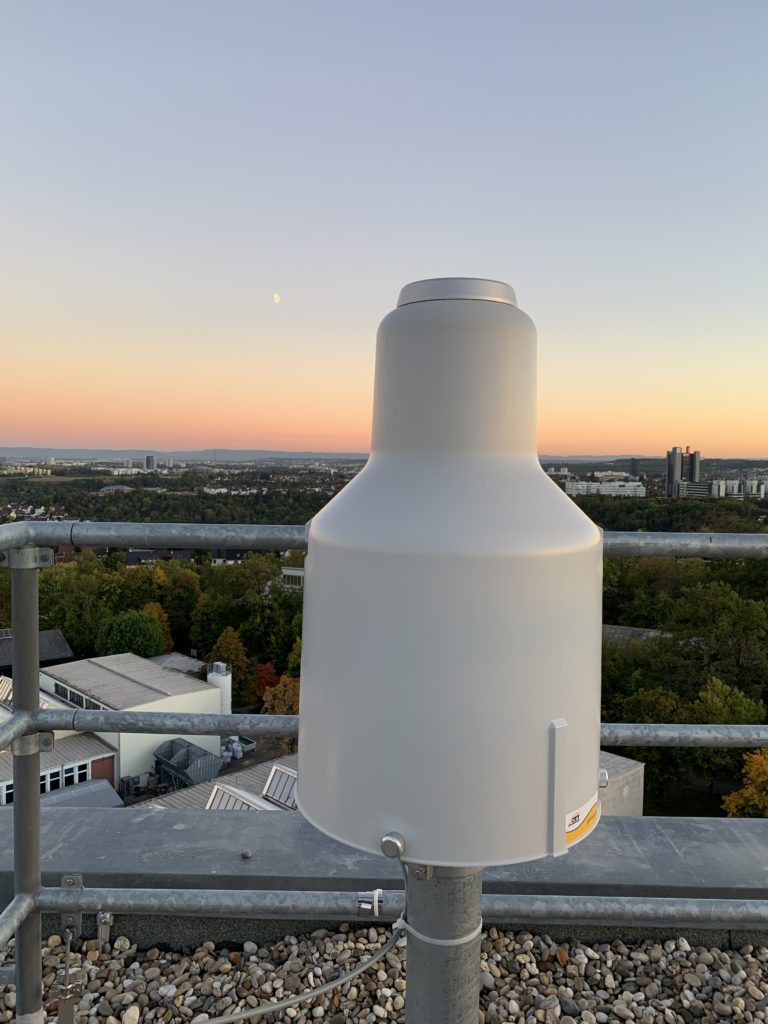
The OTT PLUVIO 2 rain gauge with weighing principle is used at the RMI for all types of precipitation. Whatever the weather conditions, drizzle, sleet, hail or snow, the reliability and accuracy of the new OTT Pluvio2 rain gauge make it possible to measure both the accumulation and intensity of all types of precipitation.
It takes account of external parameters such as temperature and wind that could influence the results.
4. Bucket-type rain gauges
Tipping bucket rain gauges (see image 7 and 7a) are often used in stations run by amateur meteorologists. These instruments are inoperable in the event of frost. When it has snowed, the snow accumulates in the funnel and if it is heavy, the surplus may not stay above the funnel. If the frost lasts for a long time, most of the snow will sublimate and so there will still be a significant loss. The rest will appear in the measurements when the snow thaws, some time after the snowfall.
 |
5. The snow
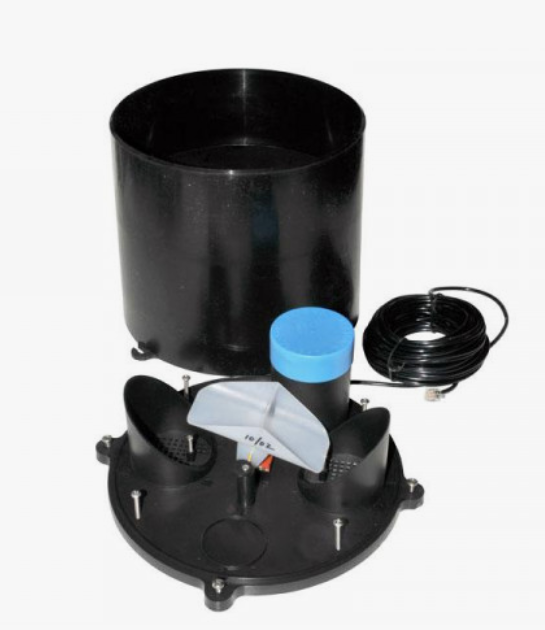
Snow must be measured when there is fresh snow. Simply measuring the height of fresh snow is an approximation, as one cm of fresh snow is equivalent to one mm of rain.
A snow gauge is used to measure snow (see image 8). This instrument has the same surface area as the rain gauge (1 dm² opening) but its volume is greater because snow is 10 times more voluminous than the water it contains. Morning observations are made by replacing the snow gauge with an empty snow gauge. You take it into a slightly heated room to avoid too much evaporation and when the snow has melted, you measure the amount of water as you would with a rain gauge. The disadvantage is that there is a lot of wetting.
Basically, the same problems as with the rain gauge will be found with the snow gauge, except for evaporation as a result of an overheated instrument.
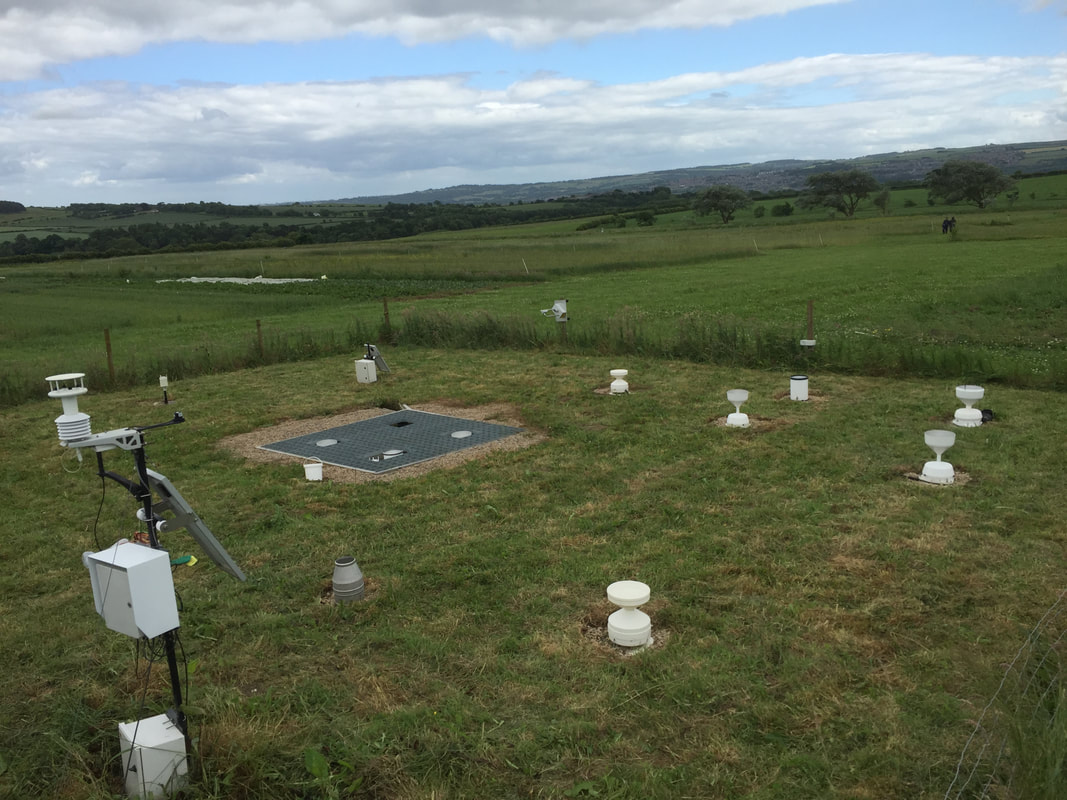
This is one of the lowland research sites instrumented as part of the KTP project. As you can see, this site has many different rain gauges mounted at ground level in a pit (grey metal grid in the centre of the picture), and above the ground.
Wind speeds and other meteorological parameters were also measured, at 0.5m and 2m above the ground. The pit rain gauges formed the reference rainfall measurement.
There were three other sites in England and Scotland which had similar equipment installations, always with a pit gauge used as the reference measurement.